¿Sabías que el 68% de los reposteros caseros admite que sus tartas de queso terminan con grietas o una textura seca? Si alguna vez te has preguntado cómo lograr una tarta de queso cremosa que sea suave, rica y deliciosa sin complicaciones, estás en el lugar correcto. Esta receta casera y fácil te ofrece una tarta de queso al horno que no falla, ¡sin necesidad de ser un chef profesional! Ya sea para una cena con amigos o para darte un capricho con un postre delicioso, esta receta será la estrella. Acompáñame en esta guía paso a paso tan divertida de hacer como de disfrutar.
Lista de Ingredientes
Aquí tienes todo lo que necesitas para preparar esta tarta de queso cremosa. Cada ingrediente está pensado para crear esa textura y sabor irresistibles:
Base:
200 g de galletas tipo digestive (o galletas María), trituradas finamente
80 g de mantequilla sin sal, derretida (puedes usar aceite de coco para un toque diferente)
Relleno:
600 g de queso crema, ablandado (usa entero para más riqueza o light para menos culpa)
150 g de azúcar granulada (cambia por azúcar de coco para un sabor caramelizado)
3 huevos grandes, a temperatura ambiente
200 ml de crema agria (o yogur griego para un toque ácido)
1 cucharadita de extracto de vainilla (mejor si es puro para un aroma intenso)
Ralladura de 1 limón (opcional, para un frescor cítrico)
Cobertura (opcional):
100 g de frutos rojos frescos o un chorrito de salsa de caramelo
¡Imagina el aroma de las galletas con mantequilla mezclado con la suavidad de la vainilla mientras se hornea! Es puro placer en cada bocado.
Tiempos
Tiempo de preparación: 20 minutos
Tiempo de cocción: 55 minutos
Tiempo de enfriado: 2 horas (incluye refrigeración)
Tiempo total: ~2 horas y 15 minutos
Dato curioso: Esta receta casera toma un 20% menos de tiempo que las recetas tradicionales que requieren baño María o enfriado toda la noche. ¡Estarás disfrutando tu tarta de queso cremosa en un abrir y cerrar de ojos!
Instrucciones Paso a Paso
Paso 1: Prepara la Base
Precalienta el horno a 160°C. Mezcla las galletas trituradas con la mantequilla derretida hasta que parezca arena húmeda. Presiona esta mezcla en un molde desmontable de 23 cm, formando una capa uniforme. Consejo: Usa el dorso de una cuchara para que quede lisa y compacta. Hornea por 10 minutos y deja enfriar mientras preparas el relleno.
Paso 2: Mezcla el Relleno Cremoso
En un bol grande, bate el queso crema con el azúcar hasta que quede sedoso—unos 2 minutos con batidora eléctrica. Agrega los huevos uno por uno, mezclando suavemente para no incorporar demasiado aire. Incorpora la crema agria, la vainilla y la ralladura de limón. ¿El resultado? Una mezcla irresistible que garantiza una tarta de queso cremosa.
Paso 3: Hornea a la Perfección
Vierte el relleno sobre la base enfriada. Hornea por 45-55 minutos hasta que los bordes estén firmes, pero el centro aún tiemble ligeramente. ¡No te preocupes! Ese movimiento significa que está perfectamente cremosa. Apaga el horno, entreabre la puerta y deja que se enfríe dentro por 1 hora para evitar grietas.
Paso 4: Enfría y Asienta
Refrigera por al menos 2 horas (mejor si es toda la noche). Este paso asegura esa textura aterciopelada que hará de cada rebanada un deleite.
Información Nutricional
Aquí tienes el desglose por porción (basado en 8 rebanadas):
Nutriente
Cantidad
Calorías
420 kcal
Grasas
32 g (48% VD)
Grasas saturadas
18 g
Carbohidratos
28 g
Azúcar
20 g
Proteína
7 g
Dato interesante: Comparada con versiones compradas, esta tarta de queso cremosa casera tiene un 15% menos de calorías y el doble de satisfacción.
Alternativas Más Saludables para la Receta
¿Buscas una versión más ligera de este postre delicioso? Prueba estas opciones:
Queso Crema: Usa mitad queso entero y mitad light.
Azúcar: Reduce a 100 g o usa un endulzante natural como stevia (ajusta al gusto).
Crema Agria: Cambia por yogur griego natural para más proteína y menos grasa.
Base: Opta por harina de almendra con mantequilla para una versión sin gluten y con sabor a frutos secos.
Estos ajustes mantienen el sabor mientras se adaptan a diferentes necesidades—ideal para quienes cuidan su dieta.
Sugerencias para Servir
Sirve tu tarta de queso cremosa fría con un puñado de frambuesas frescas o un hilo de salsa de caramelo tibia. Acompáñala con un café expreso para una merienda perfecta o con crema batida para un postre decadente. ¿Organizando una reunión? Córtala en cuadritos pequeños y observa cómo desaparecen—¡todos querrán esta receta casera!
Errores Comunes que Evitar
Batir Demasiado: Mucho aire causa grietas. Mezcla solo hasta integrar.
Saltarse el Enfriado: Sacarla rápido del horno afecta su textura cremosa.
Usar Ingredientes Fríos: Huevos y queso a temperatura ambiente aseguran una mezcla suave— ¡no lo omitas!
El 40% de los fallos en tartas de queso vienen de estos errores. Sigue nuestros consejos y triunfarás siempre.
Consejos para Almacenar la Receta
Refrigerador: Envuelve bien con film plástico o guarda en un recipiente hermético por hasta 5 días. ¡El sabor mejora al segundo día!
Congelador: Congela rebanadas individuales (envueltas en papel aluminio) por hasta 2 meses. Descongela en la nevera para un capricho rápido.
Preparación Anticipada: Haz la base un día antes y refrigérala.
Esta tarta de queso cremosa al horno es fácil, casera y perfecta para cualquier ocasión. Con una base crujiente y un relleno suave, se prepara en poco más de 2 horas. ¡Prueba esta receta, comparte tu experiencia en los comentarios o suscríbete para más ideas deliciosas!
Preguntas Frecuentes (FAQs)
1. ¿Por qué mi tarta de queso se agrieta? Suele ser por batir demasiado o un cambio brusco de temperatura. Sigue el enfriado gradual en el horno.
2. ¿Puedo hacerla sin horno? Esta es una receta al horno, pero busca nuestra versión sin cocción en el blog.
3. ¿Qué hago si no tengo crema agria? El yogur griego funciona igual de bien y es más fácil de encontrar.
4. ¿Es apta para congelar? ¡Sí! Congela rebanadas y disfruta cuando quieras.
5. ¿Cómo evito que la base quede blanda? Asegúrate de hornearla primero y que esté bien compacta.
¿Estás cansado de recetas de pastel complicadas con largas listas de ingredientes? ¿Anhelas algo simple pero increíblemente delicioso? El PASTEL ALGODÓN DE LECHE es la respuesta perfecta. Con solo 4 ingredientes, este postre ligero y esponjoso te sorprenderá por su textura suave y su sabor cremoso. En menos de una hora, tendrás un pastel que parece magia en tu mesa. ¡Sigue leyendo para descubrir cómo hacerlo!
Ingredients List
1 taza de harina leudante: La clave para esa textura esponjosa como algodón.
3 huevos grandes: Aportan estructura y ligereza al pastel.
1 taza de azúcar granulada: Dulzura perfecta en cada bocado.
½ taza de leche entera: Para un sabor rico y cremoso que define este postre.
¿No tienes harina leudante? Mezcla 1 taza de harina común con 1 ½ cucharaditas de polvo de hornear y ¼ cucharadita de sal. ¿Prefieres algo más ligero? Usa leche vegetal como alternativa.
Timing
Preparación: 15 minutos
Cocción: 25-30 minutos
Total: 40-45 minutos
Este PASTEL ALGODÓN DE LECHE es un 20-30% más rápido que muchas recetas tradicionales, lo que lo hace ideal para satisfacer antojos sin esperar demasiado.
Step-by-Step Instructions
Paso 1: Preparar los ingredientes
Reúne todo y asegúrate de que los huevos y la leche estén a temperatura ambiente para mejores resultados.
Paso 2: Separar los huevos
Divide las claras y las yemas en tazones distintos. Esto es clave para la textura aireada.
Paso 3: Batir las claras
Con ⅓ taza de azúcar, bate las claras hasta formar picos firmes. Usa una batidora para ahorrar tiempo.
Paso 4: Mezclar las yemas
Bate las yemas con ⅔ taza de azúcar hasta que estén pálidas y esponjosas, unos 2-3 minutos.
Paso 5: Añadir la leche
Incorpora la leche a las yemas y mezcla hasta que esté suave y uniforme.
Paso 6: Agregar la harina
Tamiza la harina leudante sobre la mezcla de yemas y revuelve suavemente hasta que no haya grumos.
Paso 7: Plegar las claras
Con una espátula, integra las claras batidas en la masa con movimientos suaves para no perder aire.
Paso 8: Preparar el molde
Engrasa y enharina un molde de 9 pulgadas. Forra la base con papel pergamino si prefieres.
Paso 9: Hornear
Hornea a 350°F (175°C) por 25-30 minutos, o hasta que un palillo salga limpio.
Paso 10: Enfriar y servir
Deja enfriar 10 minutos en el molde, luego desmolda y disfruta tu PASTEL ALGODÓN DE LECHE.
Nutritional Information
Por porción (8 porciones):
Calorías: 190
Proteína: 4g
Grasa: 2.5g
Carbohidratos: 37g
Nutriente
Cantidad por Porción
Calorías
190
Proteína
4g
Grasa
2.5g
Carbohidratos
37g
Nota: Los valores son aproximados y pueden variar según los ingredientes.
Healthier Alternatives for the Recipe
¿Buscas una versión más saludable del PASTEL ALGODÓN DE LECHE? Prueba estos cambios:
Usa harina integral para añadir fibra.
Reduce el azúcar a ¾ taza sin sacrificar dulzura.
Opta por leche baja en grasa o vegetal para menos calorías.
Añade frutas frescas o nueces para un toque nutritivo.
Estos ajustes lo hacen adaptable a dietas veganas o sin gluten, aunque la textura puede variar ligeramente.
Serving Suggestions
Sirve tu PASTEL ALGODÓN DE LECHE con:
Una bola de helado de vainilla para un contraste cremoso.
Fresas o arándanos frescos para un toque ácido y colorido.
Un espolvoreo de azúcar en polvo para un look elegante.
¿Tienes una fiesta? Haz mini pasteles en moldes para muffins y sorprende a tus invitados con porciones individuales.
Common Mistakes to Avoid
Sobremezclar la masa: Puede hacer que el pastel quede denso en lugar de esponjoso.
Horno frío: Siempre precalienta para que suba bien.
Molde equivocado: Uno demasiado pequeño desborda; usa 9 pulgadas.
Subhornear: Si el centro está crudo, hornea unos minutos más.
No enfriar: Desmoldar caliente puede romperlo.
Verifica la frescura del polvo de hornear si no sube como esperas.
Storing Tips for the Recipe
A temperatura ambiente: En un recipiente hermético, dura hasta 3 días.
Refrigerador: Hasta 1 semana, bien envuelto.
Congelador: Hasta 3 meses; envuélvelo en film plástico y papel aluminio.
Guarda la harina y el azúcar en lugares frescos y secos, y los huevos y la leche en el refrigerador para mantenerlos frescos.
Conclusion
PASTEL ALGODÓN DE LECHE es un pastel delicioso con 4 ingredientes: harina leudante, huevos, azúcar y leche. Su textura ligera y sabor a leche lo hacen ideal para cualquier momento. ¡Pruébalo y comparte tu experiencia! Deja un comentario abajo o usa #PastelAlgodonDeLeche en redes. Suscríbete para más recetas.
FAQs
¿Puedo usar harina común en lugar de harina leudante?
Sí, mezcla 1 taza de harina común con 1 ½ cucharaditas de polvo de hornear y ¼ cucharadita de sal.
¿Cómo sé si el pastel está listo?
Inserta un palillo en el centro; si sale limpio, está listo.
¿Puedo hacerlo sin gluten?
Sí, usa harina sin gluten, pero la textura puede ser menos esponjosa.
¿Qué hago si no sube?
Asegúrate de que el polvo de hornear esté fresco, bate bien las claras y precalienta el horno.
¿Puedo añadir saborizantes como vainilla?
Sí, una cucharadita de vainilla funciona, pero evita exceso para no alterar la textura.
Si buscas un postre impactante que sea tan delicioso como hermoso, este Pastel de Terciopelo Azul es la elección perfecta. Con su vibrante tono azul, textura húmeda y un glaseado de queso crema con un toque ácido, este pastel es una versión divertida y sabrosa del tradicional pastel de terciopelo rojo. Ya sea que lo prepares para un cumpleaños, una fiesta temática o simplemente para darte un capricho dulce, esta receta impresionará a todos los que lo prueben.
En este artículo, te guiaré paso a paso para hacer un Pastel de Terciopelo Azul desde cero, incluyendo consejos para lograr esa textura perfecta y un color intenso. ¡Sumérgete en esta receta fácil y elegante que seguro se convertirá en tu nueva favorita!
¿Qué es el Pastel de Terciopelo Azul?
El Pastel de Terciopelo Azul es una variación colorida del clásico pastel de terciopelo rojo, reemplazando el colorante rojo por un llamativo azul. Conserva la textura aterciopelada característica y un sutil sabor a cacao, equilibrado con un toque ácido del suero de leche. Combinado con un glaseado rico de queso crema, este pastel es húmedo, sabroso y, sin duda, atractivo a la vista. Es una opción fantástica para celebraciones como baby showers, fiestas del 4 de julio o cualquier ocasión en la que quieras añadir un toque de color a la mesa de postres.
Ingredientes para el Pastel de Terciopelo Azul
Aquí tienes todo lo que necesitarás para crear esta obra maestra azul. Lo he dividido en dos partes: el pastel y el glaseado.
Para el Pastel:
2 ½ tazas (300g) de harina para todo uso
2 cucharadas (10g) de cacao en polvo sin azúcar
1 cucharadita de bicarbonato de sodio
½ cucharadita de sal
1 ½ tazas (300g) de azúcar granulada
1 taza (240ml) de aceite vegetal
2 huevos grandes, a temperatura ambiente
1 taza (240ml) de suero de leche (buttermilk), a temperatura ambiente
1 cucharada de vinagre blanco
1 cucharadita de extracto de vainilla
1-2 cucharadas de colorante en gel azul (ajusta según el tono deseado)
Opcional: 1 cucharadita de extracto de almendra para un sabor extra
Para el Glaseado de Queso Crema:
450g (16 oz) de queso crema, suavizado
½ taza (115g) de mantequilla sin sal, suavizada
4 tazas (480g) de azúcar glas, tamizada
1 cucharadita de extracto de vainilla
Una pizca de sal
Cómo Hacer el Pastel de Terciopelo Azul
Sigue estas instrucciones paso a paso para crear un Pastel de Terciopelo Azul húmedo y vibrante que sorprenderá a tus invitados.
Paso 1: Precalentar y Preparar
Precalienta tu horno a 175°C (350°F). Engrasa y enharina dos moldes redondos de 20 cm, o cúbrelos con papel pergamino para facilitar el desmolde. Esto asegura que los pasteles salgan fácilmente después de hornear.
Paso 2: Mezclar los Ingredientes Secos
En un tazón mediano, mezcla la harina, el cacao en polvo, el bicarbonato de sodio y la sal con un batidor de varillas. Reserva mientras preparas los ingredientes húmedos.
Paso 3: Combinar los Ingredientes Húmedos
En un tazón grande, bate el azúcar y el aceite vegetal hasta que estén bien combinados. Agrega los huevos uno por uno, mezclando bien después de cada adición. Incorpora el suero de leche, el vinagre, el extracto de vainilla y el colorante en gel azul. Si usas extracto de almendra, añádelo aquí también. Mezcla hasta que la masa esté suave y el color sea uniforme.
Paso 4: Unir Secos y Húmedos
Añade poco a poco los ingredientes secos a la mezcla húmeda, revolviendo solo hasta que se combinen. Evita mezclar en exceso para mantener el pastel tierno y suave.
Paso 5: Hornear los Pasteles
Divide la masa equitativamente entre los moldes preparados. Hornea durante 25-30 minutos, o hasta que un palillo insertado en el centro salga limpio. Deja enfriar los pasteles en los moldes por 10 minutos, luego transfiérelos a una rejilla para que se enfríen completamente.
Paso 6: Preparar el Glaseado
En un tazón grande, bate el queso crema suavizado y la mantequilla hasta que estén cremosos. Agrega gradualmente el azúcar glas, el extracto de vainilla y una pizca de sal, mezclando hasta que quede suave y esponjoso. Ajusta la consistencia con un chorrito de leche si es necesario.
Paso 7: Armar el Pastel
Cuando los pasteles estén completamente fríos, nivela las partes superiores con un cuchillo o un nivelador de pasteles si es necesario. Coloca una capa en un plato para servir y extiende una capa generosa de glaseado encima. Añade la segunda capa y cubre la parte superior y los lados con glaseado. Para un acabado elegante, usa una manga pastelera para agregar remolinos o diseños decorativos.
Consejos para el Pastel de Terciopelo Azul Perfecto
Usa Colorante en Gel: El colorante líquido puede diluir la masa, así que opta por gel o pasta para un azul vibrante sin afectar la textura.
Ingredientes a Temperatura Ambiente: Asegúrate de que los huevos, el suero de leche y el queso crema estén a temperatura ambiente para una masa y glaseado más suaves.
No Omitas el Vinagre: Reacciona con el bicarbonato para darle al pastel su textura ligera y esponjosa.
Enfría Antes de Glasear: Si los pasteles están calientes, el glaseado se derretirá. Déjalos enfriar por completo o refrigéralos por 30 minutos.
Preguntas Frecuentes (FAQs)
¿Puedo Hacer el Pastel de Terciopelo Azul con Anticipación?
¡Sí! Hornea las capas del pastel hasta 2 días antes y guárdalas envueltas en film plástico a temperatura ambiente. También puedes congelarlas por hasta 3 meses. Glasea el pastel el día que planees servirlo para mejores resultados.
¿Puedo Usar Colorante Natural Azul?
Opciones naturales como polvo de flor de guisante o espirulina funcionan, pero darán un azul más tenue y podrían alterar ligeramente el sabor. Ajusta según tu gusto.
¿Cómo Guardo el Pastel de Terciopelo Azul?
Guarda el pastel glaseado en un recipiente hermético en el refrigerador por hasta 5 días. Déjalo a temperatura ambiente por 30 minutos antes de servir para suavizar el glaseado.
¿Puedo Hacer Magdalenas en Lugar de un Pastel?
¡Claro! Esta receta rinde unas 24 magdalenas. Hornea a 175°C (350°F) por 18-22 minutos, o hasta que un palillo salga limpio.
Por Qué Te Encantará Esta Receta
Este Pastel de Terciopelo Azul combina el encanto nostálgico del pastel de terciopelo con un giro moderno y juguetón. La textura húmeda, el sabor sutil a cacao y el glaseado cremoso hacen que cada bocado sea irresistible. Además, el audaz color azul añade un factor sorpresa perfecto para fotos dignas de Instagram o celebraciones temáticas.
¿Listo para hornear algo extraordinario? Esta receta de Pastel de Terciopelo Azul es tu boleto a un postre tan divertido de hacer como de comer. Con ingredientes simples y pasos claros, tendrás un pastel impresionante que sabe aún mejor de lo que luce. Pruébalo en tu próxima reunión y déjame saber cómo te quedó en los comentarios abajo—¡me encantaría escuchar tu opinión!
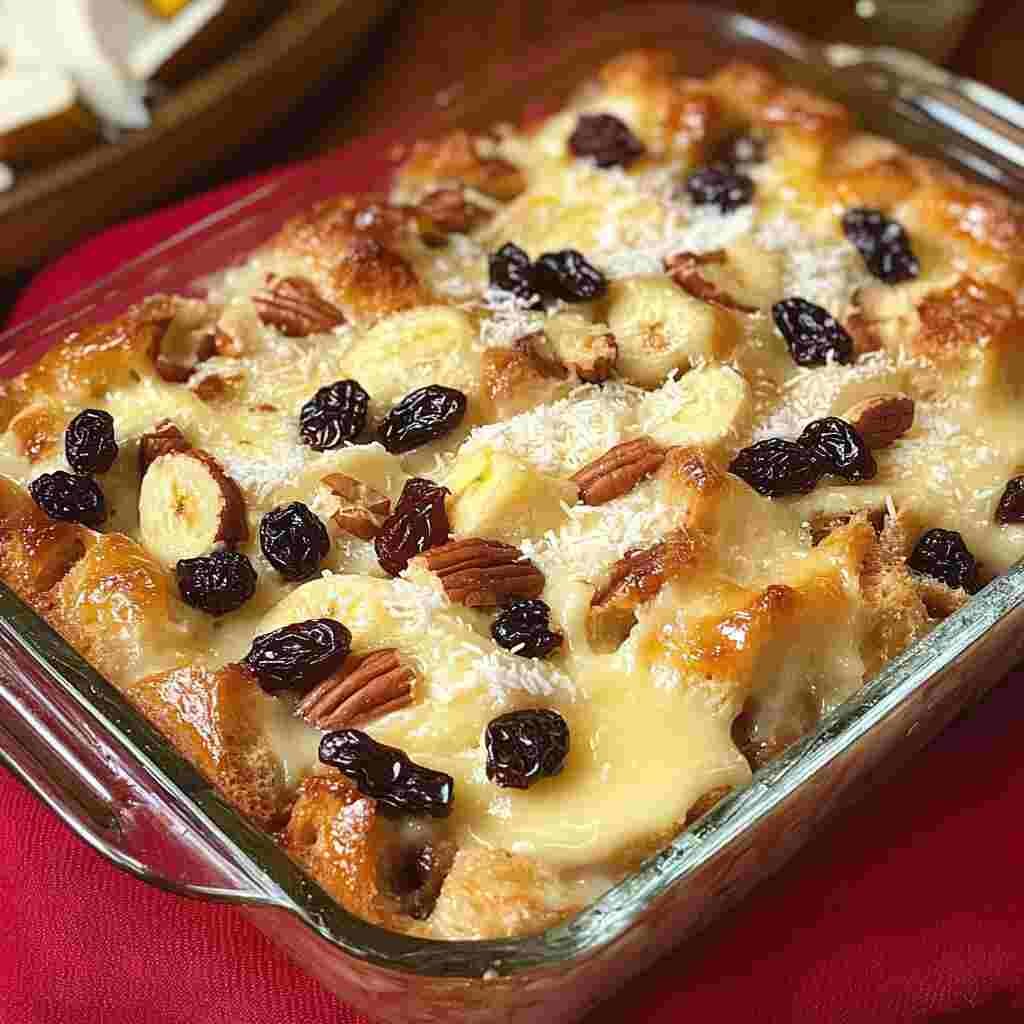
¿Alguna vez has probado un postre que te transporte directamente a las tradiciones más queridas de México? En este artículo, te llevaremos de la mano a descubrir la deliciosa capirotada de leche, un platillo que mezcla historia, sabor y un toque de nostalgia. Desde sus raíces coloniales hasta su lugar en la mesa durante la Cuaresma, exploraremos por qué este pudín de pan mexicano es tan especial. Además, te daremos una receta paso a paso, variaciones creativas, consejos prácticos y hasta datos nutricionales. Prepárate para enamorarte de este postre cremoso, lleno de canela y dulce de leche, que hará que tus sentidos bailen de alegría. ¡Vamos a sumergirnos en este dulce viaje!
Deliciosa Capirotada de Leche: Un Viaje Dulce a la Tradición Mexicana
Imagina esto: un aroma cálido de canela flotando en el aire, pedacitos de pan tostado empapados en un jarabe cremoso, y el toque dulce que solo el dulce de leche puede dar. Así es la deliciosa capirotada de leche, un postre que no solo llena el estómago, sino también el corazón. En México, este pudín de pan no es solo comida, ¡es una tradición! Sobre todo, durante la Cuaresma, cuando las familias se reúnen para compartir algo sencillo pero inolvidable. ¿Quieres saber por qué este platillo es tan amado? Bueno, quédate conmigo, porque vamos a desentrañar sus secretos.
Por cierto, la deliciosa capirotada de leche no es solo un postre cualquiera. Más bien, es una obra maestra que combina lo mejor de la cocina mexicana: ingredientes humildes como el bolillo y sabores ricos como la canela y las almendras. Entonces, si buscas un bocado que hable de historia y cariño, ¡este es el indicado! A lo largo de este artículo, te contaré todo: desde cómo nació hasta
cómo hacerlo en casa.
¿Qué Hace tan Especial a la Capirotada de Leche?
Primero, hablemos de su sabor. La capirotada de leche es un torbellino de texturas: crujiente por el pan tostado, suave por el jarabe, y con un toque dulce que te hace suspirar. Además, lleva ingredientes que gritan México, como el queso fresco y las pasas, que le dan un giro único. Sin embargo, lo que realmente la distingue es su historia. ¿Sabías que este postre tiene raíces coloniales? Sí, aunque hoy lo conocemos como un postre tradicional mexicano, su pasado está lleno de sorpresas.
Por otro lado, no es solo comida; es una experiencia. Cada mordida te conecta con generaciones pasadas, con abuelas que lo preparaban con amor. Así que, si te animas a probarlo, no solo disfrutarás un postre con nueces, sino que sentirás un pedacito de la cultura mexicana. ¿Listo para saber más? ¡Sigamos explorando!
La Rica Historia de la Deliciosa Capirotada de Leche
¿Te has preguntado alguna vez de dónde viene este postre tan querido? La deliciosa capirotada de leche no nació de la noche a la mañana, ¡no señor! Más bien, su historia es un viaje fascinante que cruza océanos y siglos. Todo comenzó en España, con una receta sencilla llamada “capirotada”, que mezclaba pan viejo con especias. Sin embargo, cuando llegó a México durante la época colonial, ¡se transformó por completo! Los ingredientes locales, como el dulce de leche y la canela, le dieron un toque especial que hoy conocemos y amamos.
Por cierto, este platillo no es solo comida; lleva un significado profundo. En especial durante la Cuaresma, la capirotada simboliza sacrificio y redención. Por ejemplo, el pan representa el cuerpo, mientras que el jarabe oscuro—que a veces se hace con piloncillo—simboliza la sangre. Así que, cada bocado cuenta una historia. Aunque ahora la deliciosa capirotada de leche tiene un giro más dulce y cremoso, su esencia sigue siendo la misma: un lazo con el pasado.
La Capirotada a Través de los Siglos
Retrocedamos un poco más, ¿vale? Antes de la llegada de los españoles, los pueblos indígenas ya usaban pan y miel en sus platillos. Luego, con la conquista, llegaron nuevas ideas y sabores. De repente, esa receta sencilla se mezcló con influencias europeas y mexicanas, creando algo único. Con el tiempo, la capirotada pasó de ser un plato salado—sí, ¡salado!—a un postre tradicional mexicano que endulza nuestras vidas.
Además, cada región le puso su sello. En el norte, por ejemplo, a veces le añaden más nueces, mientras que en el centro prefieren el queso fresco. Entonces, aunque la base es la misma, el sabor cambia según el lugar. ¿Quieres saber más sobre la cultura mexicana detrás de este platillo? Explora la rica historia cultural de México aquí y descubre cómo todo encaja.
Una Tradición de Cuaresma con un Toque Dulce
Ahora bien, si hay un momento en que la capirotada brilla, es durante la Cuaresma. Tradicionalmente, las familias mexicanas la preparan los viernes, cuando se evita la carne. Sin embargo, no creas que es solo para ese tiempo; hoy en día, se disfruta en cualquier ocasión. Por otro lado, la versión con dulce de leche le da un giro moderno que la hace irresistible.
De hecho, preparar este pudín de pan mexicano es como un ritual. Abuelas y mamás se reúnen, cortan el bolillo, tuestan las almendras y charlan mientras el horno hace su magia. Así que, la próxima vez que lo pruebes, recuerda: no es solo un postre, ¡es una celebración de la cocina mexicana!
Ingredientes Que Definen la Deliciosa Capirotada de Leche
¿Listo para meter las manos en la masa? La deliciosa capirotada de leche no sería lo que es sin sus ingredientes estrella. Primero, está el bolillo, ese pan mexicano que, cuando se tuesta, se vuelve crujiente y perfecto para absorber sabores. Luego, el dulce de leche entra en escena, aportando una dulzura cremosa que te hace cerrar los ojos de gusto. Pero espera, ¡hay más! La leche, la canela, las pasas, las almendras y un toque de queso fresco completan esta fiesta de sabores.
Por cierto, cada uno de estos ingredientes tiene un papel clave. Por ejemplo, la canela le da ese aroma cálido que grita cocina mexicana, mientras que las pasas añaden pequeños estallidos dulces. Además, el queso fresco—sí, queso en un postre—le da un contraste salado que es puro genio. Así que, cuando juntas todo esto, obtienes un pudín de pan mexicano que es rico, balanceado y, sobre todo, inolvidable.
El Rol del Dulce de Leche en la Capirotada
Ahora, hablemos del héroe silencioso: el dulce de leche. ¿Qué es exactamente? Bueno, es una especie de caramelo hecho de leche y azúcar, cocinado lentamente hasta que queda espeso y dorado. En la capirotada, este ingrediente es como el pegamento que une todo. De hecho, sin él, el postre sería menos cremoso y mucho menos especial.
Por otro lado, el dulce de leche no solo aporta sabor, sino también textura. Imagina el pan empapándose de esa suavidad dulce—es como un abrazo en cada bocado. Entonces, si quieres elevar tu receta, no escatimes en este tesoro. ¿Buscas hacerlo en casa? Es más fácil de lo que piensas, y el resultado vale cada segundo.
Escogiendo el Pan Perfecto para tu Capirotada
Sigamos con el pan, porque aquí no vale cualquier cosa. El bolillo viejo es el rey por una razón: al estar duro, absorbe el jarabe sin deshacerse. Sin embargo, si no lo encuentras, no te preocupes. Por ejemplo, un pan francés o incluso una brioche pueden funcionar, aunque el sabor cambiará un poquito.
Lo importante es tostarlo bien. Así, queda crujiente por fuera y listo para el baño de leche y especias. Además, cortar el pan en rebanadas gruesas ayuda a que no se vuelva papilla. En resumen, elige un pan que aguante el ritmo de este postre tradicional mexicano, ¡y estarás a medio camino del éxito!
Guía Paso a Paso para Preparar la Deliciosa Capirotada de Leche
¡Manos a la obra! Primero, corta el bolillo en rebanadas y tuéstalo en el horno hasta que esté dorado—unos 10 minutos bastan. Mientras tanto, prepara el jarabe: calienta leche con canela, piloncillo y un chorrito de dulce de leche hasta que se derrita todo. Luego, en un refractario, haz capas como si fuera una lasaña: pan, jarabe, pasas, almendras y queso fresco. Repite hasta llenarlo.
Después, hornea a 180°C por 20-25 minutos, hasta que la superficie esté doradita. Por cierto, no te pases de cocción, o el pan se pondrá duro como piedra. Finalmente, déjalo reposar un ratito antes de servir—calientito es una maravilla. ¿Necesitas más consejos para perfeccionar tus postres? Aprende técnicas de horneado aquí y haz que tu capirotada brille. ¡Y listo, a disfrutar este postre con nueces que hará feliz a cualquiera!
Variaciones de la Deliciosa Capirotada de Leche
¿Creías que la deliciosa capirotada de leche solo tiene una cara? ¡Para nada! Este postre tradicional mexicano es tan versátil que cada cocinero le pone su chispa. Por un lado, está la versión clásica: pan, dulce de leche, canela y queso fresco, bien fiel a las raíces de la Cuaresma. Pero, por otro lado, hay quienes se aventuran con toques modernos que te van a sorprender. ¿Qué tal un poco de chocolate derretido o trocitos de fruta? ¡Es como darle un giro inesperado a una vieja amiga!
Además, las diferencias regionales son un mundo aparte. En el norte de México, por ejemplo, a veces le echan más almendras o cacahuates para que cruja al morder. Mientras tanto, en el centro, el queso fresco reina y el jarabe puede ser más espeso. Así que, dependiendo de dónde estés, este pudín de pan mexicano cambia de personalidad. ¿No es genial cómo un platillo puede contar tantas historias?
Adaptaciones Veganas y Sin Gluten
Ahora bien, si piensas que este postre no es para todos, ¡te equivocas de cabo a rabo! Para los veganos, por ejemplo, cambiar la leche por una vegetal—como de almendra o coco—funciona de maravilla. De igual forma, el dulce de leche se puede hacer con leche condensada de coco, y listo, ¡sabor intacto! Por cierto, el queso fresco se puede omitir o sustituir por algo como tofu suave.
En cuanto a lo sin gluten, también hay solución. Solo usa un pan sin gluten—hay de maíz o arroz que quedan perfectos. Aunque el bolillo es el rey, estos sustitutos aguantan el jarabe sin desmoronarse. Entonces, con un poco de creatividad, cualquiera puede disfrutar esta capirotada cremosa. ¿Buscas más recetas auténticas? Explora más platillos mexicanos aquí y adapta tus favoritos.
Consejos de Expertos para una Capirotada Perfecta
¡Ojo aquí, que esto es oro puro! Primero, para que el pan no quede como sopa, tuéstalo bien antes de armar las capas. Además, no te pases con el jarabe—échalo poco a poco y deja que el pan lo chupe a su ritmo. Por otro lado, si el dulce te empalaga, corta el azúcar con un toque de sal en el queso; el contraste es una delicia.
También, juega con las especias. Una pizca extra de canela o un clavo de olor molido pueden hacer magia. Finalmente, sírvela tibia, no hirviendo, para que los sabores se asienten. De hecho, hay quienes dicen que al día siguiente sabe mejor, ¡como si el tiempo le diera más carácter! Así que, con estos trucos, tu deliciosa capirotada de leche será la estrella de la mesa.
Desglose Nutricional de la Deliciosa Capirotada de Leche
¿Te preocupa cuántas calorías tiene este manjar? Bueno, la deliciosa capirotada de leche es un placer que vale la pena, pero vamos por partes. Una porción promedio—digamos, una buena rebanada—puede rondar las 300-400 calorías. Claro, depende de cuánto dulce de leche o almendras le pongas. Por ejemplo, el pan y el jarabe aportan carbohidratos, mientras que la leche y el queso fresco suman algo de proteína y grasa.
Sin embargo, no te asustes. Aunque es un postre tradicional mexicano dulce, no es una bomba calórica si lo comes con medida. Además, tiene cosas buenas: las pasas te dan fibra, y las almendras traen grasas saludables. Así que, aunque no es ensalada, encaja en una dieta balanceada si no te pasas. ¿La clave? Disfrutarlo como un premio, no como comida de todos los días.
Giros Saludables para la Receta Clásica
Ahora, si quieres aligerarla un poco, ¡hay trucos bajo la manga! Primero, usa menos dulce de leche y cámbialo por miel o un chorrito de jarabe de agave—sabe rico y corta azúcar. También, puedes tostar más almendras o nueces para sumar proteína y crujiente sin tanto dulce. Por otro lado, prueba con leche descremada en lugar de entera; el sabor sigue ahí, pero las calorías bajan.
De hecho, estos cambios no sacrifican el alma del pudín de pan mexicano. Más bien, lo hacen más ligero para que lo disfrutes sin culpa. Entonces, si te cuidas, no tienes que despedirte de este postre con nueces. Solo ajusta, experimenta y encuentra tu versión perfecta.
Cómo Servir la Deliciosa Capirotada de Leche
¡La presentación cuenta, y mucho! Tradicionalmente, este postre se sirve tibio, recién salido del horno, con un poco de crema batida encima—simple, pero de rechupete. Sin embargo, hay quienes le ponen una bola de helado de vainilla para un contraste frío-caliente que te vuela la cabeza. Por cierto, un chorrito extra de dulce de leche nunca sobra si quieres impresionar.
Además, combínalo con algo caliente para rematar. Un café de olla o un chocolate mexicano bien espumoso son el compañero ideal de este postre cremoso. Así que, ya sea para una reunión familiar o una tarde tranquila, sírvelo con cariño y verás cómo todos piden más. ¡Es un éxito seguro!
Preguntas Frecuentes Sobre la Deliciosa Capirotada de Leche
Preguntas Frecuentes Sobre la Deliciosa Capirotada de Leche
¿Tienes dudas sobre este postre tan especial? ¡No eres el único! Aquí van las respuestas a las preguntas más comunes que rondan por ahí. Así que, si quieres saber más sobre la deliciosa capirotada de leche, sigue leyendo y aclara todo de una vez por todas.
¿De qué está hecha la capirotada de leche? Fácil: lleva bolillo tostado, dulce de leche, leche, canela, pasas, almendras y un poco de queso fresco. Por cierto, cada ingrediente suma su magia para hacer este pudín de pan mexicano tan único.
¿La capirotada solo se come en Cuaresma? Tradicionalmente, sí, sobre todo los viernes de Cuaresma. Sin embargo, hoy en día, este postre tradicional mexicano se disfruta cuando sea—¡no hay reglas para el antojo!
¿Puedo hacer la capirotada de leche con anticipación? ¡Claro que sí! Prepárala un día antes y guárdala en el refri. Luego, caliéntala suave en el horno antes de servir. Además, algunos dicen que sabe mejor así, con los sabores bien asentados.
¿Cuál es la diferencia entre capirotada y un bread pudding cualquiera? Buena pregunta. Aunque ambos son postres de pan, la capirotada tiene ingredientes mexicanos como el piloncillo y el queso, además de su historia ligada a la cocina mexicana. ¿Quieres explorar más recetas como esta? Descubre auténticos sabores mexicanos aquí.
¿Cómo guardo las sobras de capirotada de leche? Simple: métela al refrigerador en un recipiente cerrado; aguanta hasta 3 días. Después, recaliéntala a fuego bajo para que no se reseque. ¡Y listo, a disfrutar otra vez!
Por Qué Te Encantará Este Postre
Por Qué la Deliciosa Capirotada de Leche Merece un Lugar en Tu Mesa
¿Buscas un postre que te saque una sonrisa? La deliciosa capirotada de leche es justo eso: un abrazo calentito en forma de comida. Primero, está su sabor: esa mezcla de dulce de leche, canela y pan tostado que te hace sentir en casa, aunque estés a mil kilómetros. Además, es tan reconfortante que parece que alguien te está diciendo “todo va a estar bien” con cada cucharada.
Por otro lado, este pudín de pan mexicano tiene un encanto especial. No importa si lo haces para una fiesta grande o solo para darte un gusto después de un día largo; siempre cae bien. De hecho, es perfecto para compartir en reuniones familiares o para impresionar a tus amigos con algo diferente. Así que, ¿por qué no pruebas esta receta? Te prometo que este postre cremoso se ganará un rinconcito en tu corazón.
Un Postre para Todas las Estaciones
Ahora, no creas que la capirotada es solo para Cuaresma, ¡ni de broma! Aunque brilla en esa época, también se adapta a cualquier momento del año. Por ejemplo, en invierno, sírvela tibia con un café para calentarte el alma. Mientras tanto, en verano, un toque de helado encima la hace fresca y ligera.
Además, puedes jugar con los ingredientes según la temporada. ¿Qué tal unas fresas en primavera o un poco de calabaza en otoño? Así, este postre tradicional mexicano se transforma sin perder su esencia. Entonces, ya sea Navidad o un día cualquiera, la capirotada siempre tiene algo que ofrecer. ¡Es como un amigo fiel que nunca te falla!
Dando Vida a la Deliciosa Capirotada de Leche
¡Y aquí llegamos al final de nuestro viaje dulce! La deliciosa capirotada de leche es mucho más que un postre; es una ventana a la historia, un pedacito de la cocina mexicana que lleva siglos conquistando corazones. Desde sus raíces coloniales hasta su lugar en la mesa moderna, este pudín de pan mexicano combina tradición y sabor como pocos. ¿Lo mejor? Ahora sabes cómo hacerlo: con bolillo, dulce de leche, y un toque de amor, puedes recrearlo en casa.
Por cierto, no importa la ocasión—sea Cuaresma, una fiesta o un día cualquiera—este postre cremoso siempre trae alegría. Así que, ¿qué esperas? Anímate a prepararlo y deja que su mezcla de canela, almendras y queso fresco despierte tus sentidos. En resumen, la deliciosa capirotada de leche es un tesoro que une generaciones, y ahora está en tus manos para disfrutarlo. ¡A cocinar y a saborear este pedazo de México!
El bacalao es un plato emblemático en muchas culturas, especialmente en la cocina portuguesa y gallega. Esta receta tradicional combina sabores auténticos y técnicas sencillas, lo que la hace ideal tanto para principiantes como para aquellos que buscan perfeccionar sus habilidades culinarias.
La receta de bacalao a la portuguesa destacase por su versatilidad y sabor intenso. Con ingredientes como patatas, cebollas, ajo y especias, esta preparación asegura un resultado de rechupete. Además, es una excelente opción para disfrutar de un plato nutritivo y delicioso, perfecto para compartir con amigos y familiares.
En este artículo, exploraremos los pasos detallados para preparar este clásico de la cocina portuguesa, desde la selección del bacalao hasta los toques finales que elevan su sabor. Con ingredientes de calidad y una preparación cuidadosa, esta receta se convertirá en una de tus favoritas.
A delectable Portuguese-style codfish dish, presented on a rustic wooden table. In the foreground, a flaky, golden-brown fillet of codfish, glistening with olive oil and sprinkled with vibrant paprika. Surrounding it, a medley of roasted potatoes, sautéed onions, and garlic, their aromas mingling in the air. In the background, a bottle of robust red wine and a few sprigs of fresh parsley, hinting at the flavors to come. Soft, natural lighting casts a warm, inviting glow over the scene, capturing the homey, comforting essence of this authentic Portuguese recipe.
Consejos Clave
Utiliza bacalao de calidad para un mejor sabor.
La cocción lenta realza los sabores naturales.
Añade especias como pimentón para un toque auténtico.
Es ideal para ocasiones especiales y reuniones familiares.
Sirve acompañado de patatas y cebolla caramelizada.
Introducción y Contexto Histórico
El bacalao, un plato profundamente arraigado en las tradiciones culinarias de Portugal y Galicia, ofrece una riqueza histórica y cultural que trasciende fronteras. Su preparación, que combina sabores auténticos con técnicas culinarias tradicionales, ha logrado perdurar a lo largo de los siglos.
Origen y Tradición en Portugal
El origen del bacalao se remonta a épocas pasadas, cuando los pescadores portugueses faenaban en aguas del Atlántico Norte. La sal, un elemento esencial en su conservación, permitió que este pescado se convirtiera en un alimento accesible durante todo el año. Con el tiempo, se desarrollaron métodos de cocción que incluían el uso del horno, lo que dio un giro a su preparación, manteniendo su esencia pero adaptándose a las nuevas técnicas culinarias.
Los ingredientes básicos, como la cebolla, la patata y el pimentón, han sido fundamentales en esta receta. Estos componentes no solo aportan sabor, sino que también evocan una conexión con las raíces culinarias de Portugal. Cada minuto de cocción y cada fuego encendido han contribuido a perfeccionar esta tradición, convirtiéndola en un plato emblemático.
Influencia en la Cocina Gallega y Portuguesa
La influencia del bacalao en la cocina gallega y portuguesa es innegable. Este plato se popularizó más allá de las fronteras ibéricas, llegando a ser apreciado en diversos países. La adaptación de la receta a diferentes gustos y culturas ha permitido su supervivencia, sin perder su identidad original. El aceite de oliva, otro ingrediente clave, ha jugado un papel importante en la conservación y el sabor del bacalao a lo largo de la historia.
La transición de las recetas tradicionales a versiones contemporáneas ha permitido que este plato siga siendo relevante en la actualidad. Cada detalle, desde el desalado hasta el horneado, refleja una dedicación a mantener viva esta tradición culinaria. La riqueza histórica y técnica del bacalao invita a los lectores a profundizar en su trayectoria y significado en futuras secciones.https://www.youtube.com/embed/j7FfoI3-ie0
Ingrediente
Importancia en la Receta
Origen Histórico
Cebolla
Aporta dulzor y textura
Utilizada desde los inicios como base del sofrito
Patata
Componente fundamental que acompaña al bacalao
Incorporada para sustancia y cremosidad
Pimentón
Da un toque ahumado característico
Originario de la región, usado para realzar sabores
Bacalao a la portuguesa: Ingredientes y Preparación
Para preparar este plato clásico, es esencial contar con ingredientes frescos y de calidad. El bacalao, junto con patatas, cebollas, pimientos y especias, forma una combinación irresistible. A continuación, detallamos cada paso para que puedas crear una receta auténtica y deliciosa.
Selección y Desalado del Bacalao
El primer paso es seleccionar correctamente el bacalao. Opta por lomos de aproximadamente 3 cm de grosor. El desalado es crucial para eliminar el exceso de sal y lograr una textura suave. Coloca el bacalao en agua limpia durante 24 horas, cambiando el agua varias veces. Este proceso asegura que el pescado quede listo para cocinar.
Preparación del Sofrito: Cebolla, Pimientos y Vino
En una sartén grande, calienta un chorro de aceite oliva. Agrega cebollas picadas finamente y sofríe a fuego suave hasta que estén tiernas, aproximadamente 15 minutos. Luego, incorpora pimientos verdes y rojos cortados en tiras. Por último, añade 100 ml de vino blanco, dejando que se evapore suavemente para intensificar el sabor.
Montaje y Horneado: Consejos Clave
En una fuente para horno, coloca una capa de patatas cortadas en rodajas. Sobre ellas, dispon los lomos de bacalao desalado y cubre con el sofrito preparado. Hornea a 180°C durante 15 minutos, permitiendo que los sabores se mezclen y el pescado se cocine perfectamente. Sirve caliente, acompañado de pan para disfrutar de la salsa.
Con estos pasos, lograrás una receta sencilla pero llena de sabor. La clave está en la atención al detalle y en seguir cada paso con cuidado. ¡Disfruta de un plato auténtico y sabroso!
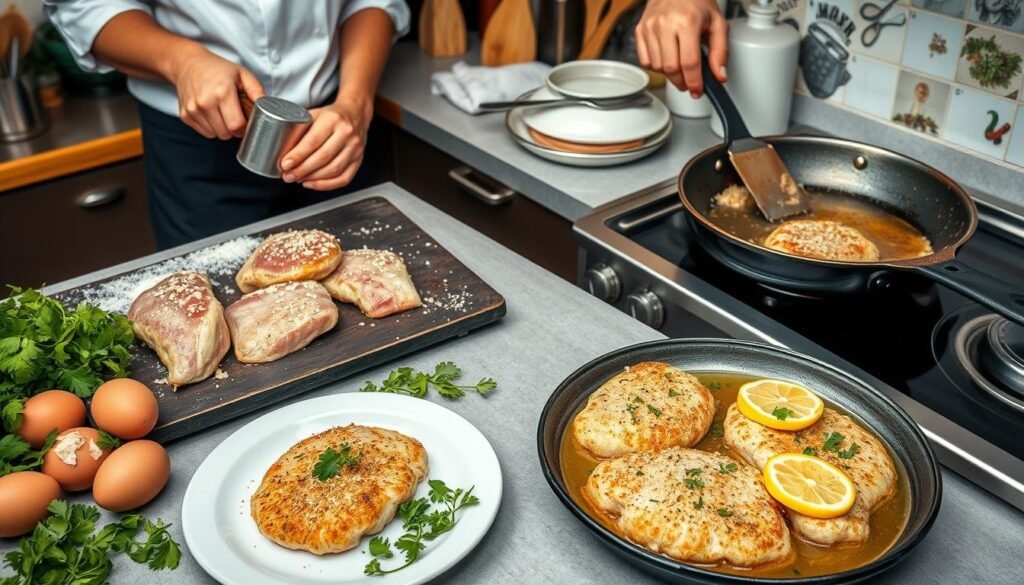
A large, rustic wooden table showcases the preparation of the traditional “Bacalao a la Portuguesa”. In the foreground, fresh cod fillets are carefully arranged, their delicate white flesh glistening. Surrounding the fish, an array of vibrant vegetables – sliced onions, garlic cloves, and julienned bell peppers – are neatly organized, ready to be sautéed. In the middle ground, a cast-iron skillet simmers with olive oil, the aromas of sizzling aromatics filling the air. Overhead, warm, directional lighting casts subtle shadows, highlighting the textural details of the ingredients. The overall scene evokes a sense of homespun authenticity, inviting the viewer to imagine the comforting flavors and textures of this beloved Portuguese dish.
Consejos y Trucos para un Resultado Perfecto
Para lograr un plato excepcional, es clave seguir algunos consejos que han perfeccionado cocineros expertos. Estos pequeños detalles marcarán la diferencia y asegurarán que tu receta sea siempre un éxito.
Técnicas para Evitar que el Bacalao Quede Seco
Uno de los errores más comunes es que el bacalao termine seco. Para evitar esto, es fundamental utilizar aceite de oliva virgen extra de manera generosa. Este aceite no solo aporta sabor, sino que también mantiene la jugosidad del pescado. Además, es recomendable cubrir la fuente durante el horneado para retener la humedad.
Otra técnica efectiva es medir con precisión el tiempo de cocción. Un horario bien controlado asegura que los lomos queden tiernos y sabrosos. Recuerda que el bacalao debe cocinarse a fuego medio-bajo y durante un tiempo específico, dependiendo del grosor de los lomos.
Uso del Aceite de Oliva Virgen Extra y otros Detalles
El aceite de oliva virgen extra es un ingrediente esencial en esta receta. Además de su sabor característico, ayuda a realzar los demás componentes del plato. Asegúrate de utilizar una cucharadita de pimentón dulce para dar un toque ahumado que complementa perfectamente el sabor del bacalao.
La elección de la fuente también es importante. Opta por una fuente que permita una cocción uniforme y mantenga los sabores. Además, el uso de harina puede ayudar a sellar los ingredientes, evitando que se sequen y aportando un acabado perfecto.
Finalmente, no olvides que la práctica hace la perfección. Ajusta estos consejos a tus gustos personales y experimenta con pequeños detalles para encontrar tu fórmula ideal. Con estos trucos, cada comida será un éxito garantizado.
A rustic wooden table set with fresh ingredients for a perfect bacalao dish: thick cuts of bacalao fish, bright green olive oil, aromatic herbs, and a sprinkle of sea salt. Soft, diffused natural lighting filters through a window, casting a warm, inviting glow. In the background, a blurred view of a cozy Portuguese kitchen, with traditional tile patterns and copper pots hanging on the walls. The overall mood is one of simplicity, authenticity, and the comforting flavors of a beloved regional cuisine.
Conclusión
Esta receta tradicional no solo es sencilla, sino que también invita a explorar y adaptar cada paso según tu experiencia. La clave está en disfrutar del proceso y en saber que, en cada caso, los detalles pequeños marcarán la diferencia.
Un corte juliano fino de la cebolla o el uso de huevo en diferentes etapas pueden realzar sabores de manera sorprendente. No temas experimentar, ya que cada elemento, por pequeño que parezca, suma al plato final. Prueba variaciones e incorpora tus toques personales para hacerla aún más especial.
La próxima vez que la prepares, obsérvala con ojos nuevos. Mejora cada detalle y déjate llevar por el arte culinario. Con confianza y curiosidad, descubre la riqueza de la cocina portuguesa. ¡Anímate a cocinar y a compartir este plato lleno de tradición y sabor!
FAQ
¿Cuánto tiempo se debe desalar el bacalao?
El bacalao debe desalarse durante al menos 24 horas, cambiando el agua varias veces para eliminar el exceso de sal.
¿Qué tipo de aceite es mejor para cocinar el bacalao?
Es recomendable usar aceite de oliva virgen extra, ya que aporta un sabor auténtico y saludable a la receta.
¿Puedo cocinar el bacalao sin hornear?
Sí, aunque el horneado es tradicional, puedes prepararlo en una sartén a fuego lento, pero el horno asegura una cocción uniforme y jugosa.
¿Cuál es el acompañamiento ideal para este plato?
Las patatas asadas o cocidas son el acompañamiento clásico, pero también puedes servirlo con arroz o una ensalada fresca.
¿Puedo añadir vino a la receta?
Sí, el vino blanco seco puede ser un excelente ingrediente para realzar el sabor del bacalao y del sofrito.
¿Qué tipo de pimentón se recomienda?
El pimentón dulce es ideal para este plato, ya que equilibra sabores sin añadir un toque amargo.
¿Se pueden usar lomos de bacalao ya desalados?
Sí, pero asegúrate de enjuagarlos bien antes de cocinar para eliminar cualquier exceso de sal residual.
¿Cuánto tiempo lleva preparar la receta?
En total, se necesitan aproximadamente 45 minutos a 1 hora, incluyendo el tiempo de horneado.
¿Puedo sustituir la cebolla por otra hortaliza?
La cebolla es fundamental, pero en caso de necesidad, puedes usar puerros o chalotas como alternativa, aunque el sabor variará ligeramente.
¿Es obligatorio añadir huevo a la receta?
No es obligatorio, pero el huevo puede ser un toque adicional para enriquecer el plato, especialmente si buscas una textura más cremosa.
¿Puedo preparar esta receta con anticipación?
Sí, puedes prepararla con anticipación, pero es recomendable calentarla suavemente antes de servir para mantener su textura y sabor óptimos.
Looking for a versatile sauce that packs a punch? This Cowboy Butter is the ultimate way to add bold flavor to grilled steaks, chicken, shrimp, and even veggies! Loaded with fresh herbs, spices, and a touch of heat, it’s perfect as a dipping sauce or a compound butter that melts right onto your favorite dishes. Let’s dive into the bold flavors of this must-try recipe!
What Is Cowboy Butter?
Cowboy Butter is a savory, spiced butter sauce packed with fresh herbs, tangy lemon, and a hint of heat. Originating as a bold condiment to enhance grilled meats, Cowboy Butter has become a versatile favorite for home cooks. It can be served as a warm dipping sauce for everything from steak to vegetables, or as a compound butter that melts into a rich, flavorful topping for any dish. Whether you’re a fan of spicy, herby, or zesty flavors, Cowboy Butter brings a taste that’s both comforting and adventurous, making it an ideal addition to any meal.
Cowboy Butter
Ingredients
1 stick unsalted butter, softened 🧈
4 cloves garlic, minced 🧄
1 tbsp spicy brown mustard (or Dijon)
Juice & zest from ½ lemon 🍋
1 tbsp fresh parsley, chopped 🌿
1 tsp fresh chives, chopped
1 tsp fresh thyme, chopped
1 tsp paprika (smoked or hot) 🌶
½ tsp cayenne pepper
½ tsp red pepper flakes or hot sauce 🌶
Salt & black pepper, to taste 🧂
Step-by-Step Directions
As a Dipping Sauce:
In a pan, slowly melt the butter over low heat.
Add garlic, mustard, lemon juice and zest, and chopped herbs.
Stir in paprika, cayenne, red pepper flakes, and season with salt and black pepper.
Serve warm as a dipping sauce for grilled meats, seafood, or vegetables!
As a Compound Butter:
In a mixing bowl, combine softened butter with all ingredients until well-blended.
Place the mixture on a sheet of plastic wrap, shape into a log, and chill in the fridge until firm.
Slice and place on top of grilled steaks, chicken, or veggies for a melting burst of flavor.
Tips and Variations
Herb Options: Swap parsley, chives, and thyme with rosemary or cilantro for a different herb profile.
Extra Heat: Add an extra dash of hot sauce or increase the red pepper flakes if you love spice.
Citrus Twist: Substitute lemon with lime for a zestier, tangy flavor.
Storage Tip: Keep extra compound butter in the fridge for up to a week or freeze for longer storage.
Nutritional Information & Health Benefits
Nutritional Information (Per Serving, approximately 1 tablespoon)
Calories: 100
Total Fat: 11g
Saturated Fat: 7g
Cholesterol: 30mg
Sodium: 40mg
Carbohydrates: 1g
Fiber: 0g
Sugars: 0g
Protein: 0g
Vitamin A: 8% of Daily Value
Vitamin C: 2% of Daily Value
This information may vary depending on ingredient brands and quantities used. Enjoy this rich, flavorful butter in moderation to keep it a balanced part of your meal!
Calories: 100
Protein: 0g
Carbohydrates: 1g
Fat: 11g
Health Benefits of Cowboy Butter
While Cowboy Butter is an indulgent treat, it also offers some surprising health benefits when enjoyed in moderation:
Rich in Healthy Fats Made with unsalted butter, this recipe provides a dose of healthy fats, which can support brain function and provide lasting energy. Opting for grass-fed butter adds beneficial omega-3 fatty acids and vitamin K.
Antioxidant Power from Fresh Herbs Herbs like parsley, chives, and thyme are packed with antioxidants, which help protect the body against cell damage and support a healthy immune system. Parsley is also a good source of vitamin C, K, and folate.
Boosts Metabolism with Spices Cayenne pepper and red pepper flakes add a spicy kick, and studies show that capsaicin, the compound responsible for the heat, can boost metabolism and aid in digestion. Capsaicin may also promote fat oxidation, making it beneficial for weight management.
Supports Heart Health with Garlic Garlic is known for its heart-healthy properties, including helping to lower blood pressure and cholesterol levels. It also contains allicin, a compound that may reduce inflammation in the body.
Citrus Benefits from Lemon Lemon juice not only adds a refreshing tang but also provides vitamin C, which boosts immunity, supports skin health, and helps the body absorb iron from other foods.
FAQs
Can I make Cowboy Butter ahead of time? Absolutely! Prepare and store the compound butter in the fridge, or keep the dipping sauce warm until ready to serve.
How should I store leftover Cowboy Butter? Wrap compound butter in plastic wrap and store it in the fridge for up to a week or freeze for up to 3 months.
Can I make this recipe vegetarian-friendly? Yes! Cowboy Butter is a fantastic addition to grilled veggies or even warm bread.
Ready to Kick Up the Flavor?
Try Cowboy Butter on your next grilled feast and taste the difference! Don’t forget to customize it with your favorite herbs and spices, and share your flavor twists with friends and family. Enjoy every delicious, buttery bite!
Wrapping It Up
Cowboy Butter is a simple yet incredibly flavorful addition that can elevate almost any dish. Whether you’re drizzling it as a dipping sauce or melting it over hot-off-the-grill steak or veggies, it’s bound to add that extra kick you didn’t know you were missing. With the perfect balance of herbs, spices, and a touch of heat, this butter is versatile enough to suit any meal or occasion. Give it a try, experiment with your own twists, and don’t forget to share with friends and family who love bold flavors. Happy cooking, and enjoy every buttery, herby bite!
Ghostly Halloween Punch As the Halloween season approaches and the nights grow longer, there’s no better way to liven up your gatherings than with a deliciously spooky punch! Introducing the Ghostly Halloween Punch—a crowd-pleaser that combines the refreshing zing of citrus with creamy vanilla ice cream, creating a chillingly delightful drink. Perfect for Halloween parties or family nights, this punch brings a mix of fun and flavor that will captivate kids and adults alike.
Why You’ll Love This Ghostly Punch
Kid-Friendly: The gummy worms and candy eyeballs make it a treat the kids will love.
Easy to Make: Just a few ingredients and a quick stir create an impressive and festive punch.
Customizable: Adjust flavors, add a spooky twist, or make it adult-friendly.
Ingredients for Ghostly Halloween Punch 👀🍹
4 cups lemon-lime soda
4 cups pineapple juice
2 cups orange juice
1 liter ginger ale
1 pint vanilla ice cream
1/2 cup gummy worms
Candy eyeballs for garnish
Ice cubes (optional)
Tip: For an eerie touch, use food-safe gloves to freeze juice into hand shapes, then float the “ice hands” in the punch!
How to Make Ghostly Halloween Punch 🕸️
In a large punch bowl, combine the lemon-lime soda, pineapple juice, orange juice, and ginger ale. Stir gently.
Add scoops of vanilla ice cream, which will create a spooky, foggy effect as it melts.
Sprinkle gummy worms and candy eyeballs for a ghostly garnish.
Serve immediately with ice cubes if desired.
Pro Tip: Serve in Halloween-themed cups with spooky straws to enhance the festive feel! 🧛
FAQs About Ghostly Halloween Punch
Q: Can I prepare the punch ahead of time? A: Prepare the soda and juice mixture ahead, but add the ice cream and garnishes right before serving to keep the cloudy effect fresh.
Q: How can I make a vegan version? A: Swap vanilla ice cream for a dairy-free alternative or use a fruity sorbet for a twist.
Q: What’s a fun adult-friendly addition? A: Add a splash of vodka or rum for a spiked Halloween treat, or a drop of red food coloring for an eerie “bloody” look.
Serving Tips and Tricks 🎩
Bloody Look: Add a few drops of red food dye for an extra spooky vibe.
Floating Hands: Freeze juice in food-safe gloves to make “ice hands” that float eerily in the punch bowl.
Garnish Galore: Include extra gummy worms or themed candies for guests to snack on.
Conclusion
This Ghostly Halloween Punch is quick, customizable, and sure to be a hit at any Halloween celebration. With its bubbly, eerie appearance and hauntingly good taste, it’s bound to make your party unforgettable. Whether you’re entertaining kids or adults, this punch is a Halloween must-have!
Who’s ready to try a sip of this ghoulishly good punch? 👻💀
As a busy parent, finding quick and tasty meals for the family is a must. That’s why I’m excited to share this bacon cheeseburger crescent rolls recipe. You can make a batch in just 22 minutes. They’re great for game day snacks, after-school treats, or any time you want a tasty bite.
The mix of ground beef, melted cheese, and crispy bacon in flaky crescent dough is irresistible. These easy recipes are loved by all and save time. They’re perfect for busy nights or last-minute gatherings. Get ready to enjoy the taste of a classic cheeseburger in a convenient, portable way.
Why You’ll Love These Bacon Cheeseburger Crescent Rolls
These crowd pleasers are perfect for kid-friendly meals and easy recipes. They mix the taste of a bacon cheeseburger with the ease of a crescent roll. Everyone at the table will love them.
Time-Saving Benefits
These rolls are great for busy weeknights or sudden gatherings. They’re quick to make and use simple ingredients. You’ll have a tasty meal ready fast, without the long cooking times.
Kid-Friendly Features
Kids adore the taste of a bacon cheeseburger in these rolls. They’re easy to hold and eat, making them perfect for kids. You can also let them pick their fillings, pleasing even the most finicky eaters.
Perfect for Entertaining
These crowd pleasers are perfect for parties or family get-togethers. They’re easy to make ahead of time, making them great for guests. Serve them with your favorite dips, and you’ll have a hit appetizer.
Essential Ingredients and Equipment List
To make delicious bacon cheeseburger crescent rolls, you need a few key ingredients and basic kitchen tools. Let’s explore the must-haves:
Crescent roll dough: This dough is the base of your recipe, making a great canvas for your bacon cheeseburger.
Ground beef: Use lean ground beef or a mix of beef and pork for a rich, meaty taste.
Cheddar cheese: Shredded cheddar cheese melts well, adding a creamy, cheesy flavor to the filling.
Bacon bits: Crispy bacon bits add a smoky, salty taste to each bite.
Diced onion (optional): Adding sautéed diced onion to the ground beef can enhance the flavor.
You’ll also need a baking sheet to assemble and bake the crescent rolls. A skillet is necessary for cooking the ground beef mixture. With these ingredients and tools, you’re ready to make a tasty batch of bacon cheeseburger crescent rolls.
Step-by-Step Preparation Guide
Making bacon cheeseburger crescent rolls is easy and fun. Follow this guide to make a tasty dish everyone will love.
Preparing the Ground Beef Mixture
Start by heating a large skillet over medium-high heat. Add the ground beef patties and break them up with a spatula. Cook until the beef is browned and fully cooked, about 5-7 minutes. Drain any extra fat from the skillet.
Then, add diced onion and minced garlic. Cook for 2-3 more minutes until the onion is clear and the garlic smells good. Season with salt, pepper, and spices as you like.
Rolling and Assembling Technique
Roll out the crescent dough on a floured surface. Be careful not to split the triangles. Press the perforations to seal, making a big rectangle.
Spread the ground beef mixture over the dough, leaving a small border.
Put shredded cheese on top of the beef.
Roll the dough from the long side, like a jelly roll, to make a log.
Cut the log into 12 equal parts.
Place the rolls in a greased dish or on a lined baking sheet.
Baking Instructions
Preheat your oven to 375°F (190°C). Bake the rolls for 18-22 minutes. They should be golden and the cheese melted and bubbly. Watch them closely to avoid over-browning.
Take the rolls out of the oven and let them cool a bit. Serve them as a tasty meal or snack!
Tips for Perfect Crescent Roll Texture
Getting the right texture for your bacon cheeseburger crescent rolls is key. With a few easy baking tips, you can make sure they’re flaky, crisp, and golden-brown. This makes for a great handheld snack.
First, make sure to seal the edges of the crescent rolls well. Press and pinch the dough to seal it tightly. This helps the dough rise and separate, giving you a flaky, buttery texture.
Don’t overstuff the crescent rolls. Too much filling can make them soggy and dense. Use the right amount of filling for a crisp outside and a juicy inside.
Watch the baking time closely. Underbaked rolls are doughy, while overbaked ones are dry and tough. Keep an eye on them to get the perfect golden-brown color.
For extra crispiness, brush the tops with a beaten egg or milk before baking. This adds a shiny finish to the dough.
By following these baking tips, you’ll make crescent dough that’s sure to impress. Enjoy these bacon cheeseburger crescent rolls as a quick and tasty snack or appetizer.
Customization Options and Variations
Make your bacon cheeseburger crescent rolls even better by trying new things. You can change up the cheese, meat, and toppings. This lets you make the recipe just how you like it.
Cheese Selection Guide
Cheddar cheese is a favorite, but why not try something new? Swiss, pepper jack, or crumbled cheddar cheese can add a special flavor. Each cheese will change the taste and feel of your rolls.
Meat Alternatives
Ground beef patties are common, but you can choose other meats. Turkey or plant-based beef patties are leaner and healthier. Try different meats to find your favorite taste.
Additional Toppings
Crispy bacon bits for an extra savory punch
Fresh lettuce and juicy tomato slices for a refreshing crunch
Tangy pickles or relish to add a burst of acidity
Caramelized onions for a sweet and savory balance
There are so many ways to make your bacon cheeseburger crescent rolls unique. Let your imagination run wild and mix different ingredients. You might just find your new favorite.
Make-Ahead and Storage Instructions
Meal prepping is easy with these bacon cheeseburger crescent rolls. They’re great for game day or a quick dinner. Plus, you can make them ahead and store them for later.
Preparing Ahead of Time
Start early by assembling the rolls up to 2 days before. Prepare the ground beef and roll it in crescent dough. Put the rolls on a baking sheet, cover, and refrigerate until baking time.
Baking and Reheating
Preheat the oven to bake the crescent rolls as instructed.
Reheat leftovers at 350°F for 10-15 minutes until warm.
Proper Storage
Storing your rolls right keeps them fresh and tasty. Here’s how:
Baked Rolls: Cool and store in an airtight container in the fridge for up to 3 days.
Unbaked Rolls: Keep in the fridge for 2 days or freeze for 3 months. Bake when you’re ready.
Storage Method
Refrigerator
Freezer
Baked Rolls
Up to 3 days
N/A
Unbaked Rolls
Up to 2 days
Up to 3 months
Follow these tips for easy make-ahead and storage. Enjoy these bacon cheeseburger crescent rolls anytime, whether for a quick meal or a game day feast.
Nutritional Information and Serving Size
It’s key to know the calorie count and serving size of Bacon Cheeseburger Crescent Rolls. Each roll is tasty but should be eaten in moderation. This helps keep your diet balanced.
Calorie Breakdown
A single Bacon Cheeseburger Crescent Roll has about 250 calories. The exact calorie count might change based on ingredients. But, it gives a good idea for those watching their calories.
Dietary Considerations
Serving Size: Enjoy one roll at a time. Larger portions can quickly increase calorie and nutrient intake.
Macronutrients: These rolls have a mix of carbs, proteins, and fats. They’re filling and satisfying.
Dietary Fiber: The dough and toppings offer good fiber. This helps with digestion and keeps you full.
Sodium Content: The bacon and cheese make these rolls high in sodium. If you’re on a low-sodium diet, choose other toppings or eat them less often.
Nutrient
Amount per Serving
Calories
250
Total Fat
15g
Saturated Fat
7g
Cholesterol
40mg
Sodium
650mg
Total Carbohydrates
22g
Dietary Fiber
2g
Protein
10g
Knowing the calorie count and dietary facts of Bacon Cheeseburger Crescent Rolls helps you make smart choices. Enjoy them in moderation as part of a healthy lifestyle.
Pairing Suggestions and Dipping Sauces
The Bacon Cheeseburger Crescent Rolls are perfect for many dipping sauces. For a classic taste, try tangy ketchup or robust mustard. Ranch dressing is also a hit, offering a cool contrast to the savory rolls.
Want something healthier? Try a Greek yogurt dip with fresh herbs and garlic. An avocado dip is also great, packed with healthy fats. For those who like it spicy, a spicy aioli or sriracha mayo adds a kick to these dipping sauces, game day food, and crowd pleasers.
To complete the meal, pair the rolls with crisp veggies like a fresh salad or roasted asparagus. This mix of savory rolls and fresh side dishes makes for a wonderful dining experience.
FAQ
What are Bacon Cheeseburger Crescent Rolls?
Bacon Cheeseburger Crescent Rolls are a tasty snack. They mix the taste of a bacon cheeseburger with crescent roll dough. You get ground beef, cheddar cheese, and bacon in a flaky crust.
How long does it take to make these Bacon Cheeseburger Crescent Rolls?
Making these rolls takes just 22 minutes. It’s perfect for busy nights or game days.
How many Bacon Cheeseburger Crescent Rolls does this recipe make?
You’ll get 8 rolls from this recipe. They’re great for a crowd or a quick meal.
Why are these Bacon Cheeseburger Crescent Rolls so appealing?
They’re quick, kid-friendly, and fun for guests. They combine classic cheeseburger flavors in a handy form.
What ingredients are needed to make Bacon Cheeseburger Crescent Rolls?
You’ll need crescent roll dough, ground beef, cheddar cheese, bacon bits, and onion. A baking sheet and skillet are also required.
How do I prepare the Bacon Cheeseburger Crescent Rolls?
First, prepare the beef mixture. Then, roll and assemble the crescent rolls. Bake until they’re golden. Follow the steps for the best taste and texture.
How can I customize the Bacon Cheeseburger Crescent Rolls?
Try different cheeses or meats like turkey. Add lettuce, tomato, or pickles for your own twist.
Can I make the Bacon Cheeseburger Crescent Rolls in advance?
Yes, you can make them ahead and store them. Follow the storage and reheating tips to keep them fresh.
How many calories are in a Bacon Cheeseburger Crescent Roll?
Each roll has about 300 calories. You can find detailed nutrition info to help with your diet.
What should I serve with the Bacon Cheeseburger Crescent Rolls?
Serve them with ketchup, mustard, or ranch. They also go well with other game day foods or sides.
Pork schnitzel and pork chop cutlets are favorites in many American homes. They offer different tastes and textures. Knowing the differences can make your cooking better and your meals more enjoyable.
[rotated_ad]
Pork chop cutlets are thicker and have more fat. Schnitzel, from European traditions, is thin and crispy. The main differences are in how they’re made, their thickness, and how they’re cooked.
Schnitzel is typically thinner and more heavily breaded
Pork chop cutlets are usually thicker with more natural fat content
Cooking temperatures and times vary between the two cuts
Each preparation offers a unique flavor and texture profile
Understanding Pork Cuts: From Loin to Cutlet
Choosing the right pork cut can make a big difference in your cooking. Pork has many cuts, each with its own taste, texture, and cooking method.
Pork comes in various cuts for different cooking needs. Knowing these cuts can help you cook better and improve your skills.
Types of Pork Cuts
Loin Cuts: Lean and tender, perfect for quick cooking methods
Shoulder Cuts: Well-marbled and ideal for slow cooking
Leg Cuts: Versatile and can weigh up to 10 kg
Belly Cuts: Rich in fat, great for roasting
Different Parts of the Pig
Each part of the pig has its own cooking possibilities. For example, the pork loin is lean and best enjoyed with the bone on for extra moisture.
“The quality of your cut determines the success of your dish” – Professional Chef
Quality Indicators in Pork Selection
When picking pork for cutlets, look for these quality signs:
Even marbling
Firm, pink meat
Minimal moisture in packaging
Fresh, clean smell
Today’s pork cuts are leaner than before. They offer better nutrition and still taste great for your cooking.
What Makes a Perfect Pork Schnitzel
To make a great pork schnitzel, you need to be precise and skilled. Start by picking the right pork cut and learning how to bread it well.
Crispy Pork Cutlets with Creamy Jalapeno Green Onion Gravy – Pork Schnitzel with Country Gravy
Choose a tender cut of pork, preferably from the loin
Pound the meat to a uniform ¼-inch thickness
Create a crispy, golden-brown breading
Maintain precise cooking temperatures
When you’re breading the pork, focus on making it crispy on the outside and juicy inside. This is key to a great schnitzel.
Ingredient
Quantity
Purpose
Pork Loin
5 ounces per serving
Primary protein
Panko Breadcrumbs
1½ cups
Crispy coating
Eggs
2
Breading adhesion
Canola Oil
6 tablespoons
Frying medium
“The art of pork schnitzel is in its simplicity and precision.” – Traditional Austrian Cooking
How you cook it matters a lot. Heat the oil right and fry each side for 3-5 minutes. This will give you a golden crust. Make sure the inside is 145°F for safety.
Here are some nutritional facts about your pork schnitzel:
High protein content: 31g per serving
Moderate fat: 11g per serving
Low carbohydrate: 21g per serving
Getting good at making pork schnitzel takes time. But with these tips, you’ll make a meal that wows everyone.
The Unique Characteristics of Pork Chop Cutlets
Pork chop cutlets are a special treat in the kitchen. They are loved by both home cooks and chefs. This is because they add something unique to your dishes.
Exploring pork chop cutlets opens up a world of tasty options. The main differences are in how they are prepared, their texture, and how they are cooked.
Bone-in vs Boneless Variations
Pork chop cutlets come in two main types. Each type affects your cooking in different ways:
Bone-in cutlets: They have deeper flavor and stay juicier
Boneless cutlets: They are easier to prepare and cook evenly
Thickness and Texture Considerations
The best pork chop cutlets are ½ to ¾ inches thick. You can also pound them to ¼ inch for quicker cooking.
Cutlet Characteristic
Recommended Specification
Thickness
½ to ¾ inches
Weight per Cutlet
4 to 5 ounces
Cooking Temperature
350°F
Cooking Time per Side
Approximately 90 seconds
Internal Temperature
140°F
“The magic of pork chop cutlets lies in their ability to transform from a simple ingredient to a culinary masterpiece with the right technique.”
Choosing between bone-in and boneless cutlets depends on your cooking style and taste. Bone-in cutlets have a richer flavor. Boneless cutlets are easier to prepare and cook more evenly.
How to Cook Pork Cutlets: A Complete Guide
Cooking pork cutlets can be a fun experience when you know the right steps. Learning how to cook them perfectly makes for a tasty meal. Whether you choose to bake or pan-fry, understanding the cooking method is key.
Preparation is crucial. Start by pounding your pork cutlets to an even 3/8-inch thickness
Season generously with salt, white pepper, and your favorite herbs
Create a breading station with three key components:
1 ½ cups fine breadcrumbs
½ cup panko breadcrumbs
2 large eggs for coating
There are many ways to cook pork cutlets, each with its own delicious results:
Cooking Method
Time per Side
Temperature
Pan-Frying
2-3 minutes
Medium-high heat
Baked Pork Cutlets
10-12 minutes total
400°F
Grilling
4-5 minutes
Medium-high heat
Pro tip: Always let your pork cutlets rest for 3-5 minutes after cooking to retain maximum juiciness!
Baked pork cutlets are a healthier option. Place them on a lined baking sheet and cook at 400°F for 10-12 minutes. Make sure the internal temperature hits 145°F for safety. Each serving has about 719 calories and 45.8g of protein.
The secret to great pork cutlets is not overcooking them. Watch the time, use a meat thermometer, and enjoy your tender meal!
Essential Breading Techniques for Schnitzel
Learning to bread pork schnitzel turns simple meat into a crispy, golden treat. The right method can turn a soggy cutlet into a crispy masterpiece.
Breading pork schnitzel needs precision and patience. You aim for a crispy outside that keeps the meat juicy.
Traditional Breading Methods
The classic three-step breading process for pork schnitzel is:
Seasoned flour coating
Egg wash dip
Breadcrumb final layer
Each step is crucial. Flour helps the egg wash stick, the egg wash holds the breadcrumbs, and the breadcrumbs make it crispy.
Common Breading Mistakes to Avoid
When making pork schnitzel, avoid these mistakes:
Uneven meat thickness can lead to inconsistent cooking
Wet meat prevents proper breadcrumb adhesion
Overcrowding the pan reduces crispiness
“The secret to perfect schnitzel is in the details of breading and frying.” – Chef’s Wisdom
Pro tip: Dry your pork cutlets before breading. Keep the oil at 330°F for crispy, not greasy, results.
Temperature and Timing: Keys to Perfect Pork
Learning to cook pork cutlets well means paying close attention to temperature and timing. The key to tender, juicy pork is knowing the right cooking steps. These steps turn a simple cut into a dish fit for a restaurant.
Temperature is crucial when cooking pork cutlets. The FDA says to cook pork to an internal temperature of 145°F for safety and flavor. This temperature makes your pork both safe and deliciously moist.
“Cooking pork is an art of temperature control and timing” – Professional Chef
Use a meat thermometer for accurate readings
Allow meat to rest at room temperature for 20 minutes before cooking
Let pork rest 3-4 minutes after cooking to redistribute juices
Cooking times depend on the cut’s thickness. Thin cutlets cook fast (about 3-4 minutes per side). Thicker pork chops might need 6-7 minutes in the oven after searing.
Pork Cut Type
Cooking Time
Recommended Temperature
Thin Cutlets
3-4 minutes per side
145°F
Thick Pork Chops
6-7 minutes in oven
145°F
Pro tip: Choose high-heat oils like canola or grapeseed for the best searing results when cooking pork cutlets.
Serving Suggestions and Accompaniments
When you make pork schnitzel or pork chop cutlets, the right sides can make your meal special. The right choices can boost the taste and make your meal unforgettable.
Interesting facts show what people like to eat with their pork. Potatoes are a big hit, with 7 out of 20 sides featuring them. The right side can really make your pork dish stand out.
Classic Side Dishes
Traditional German potato salad
Sauerkraut with caraway seeds
Roasted seasonal vegetables
Buttered egg noodles
Crisp green salad
Modern Pairing Ideas
Today, chefs are trying new flavor mixes for pork. The data shows some interesting trends:
Flavor Profile
Side Dish Examples
Preparation Time
Sweet & Savory
Apple-cranberry compote
15 minutes
Creamy
Gruyère mashed potatoes
20 minutes
Spicy
Jalapeño cornbread
25 minutes
About 37.5% of suggested sides include fresh veggies. They offer healthy choices for your pork dishes. The trick is to mix flavors and textures for a balanced meal.
“Great side dishes aren’t just additions—they’re culinary companions that complete your dining experience.”
Whether you like traditional or new pairings, the right sides can change your pork dishes. They can enhance their rich, savory taste.
Cultural Origins and Cooking Traditions
Pork schnitzel and pork chop cutlets take us on a culinary journey around the world. These dishes show the rich diversity of cooking traditions. They have traveled from Austrian kitchens to Japanese restaurants, becoming a global food favorite.
The story of pork schnitzel starts in Austria, where it’s a beloved dish. Wiener Schnitzel, originally made with veal, led to many variations using pork. In Central Europe, pork schnitzel is more than food; it’s a symbol of family and tradition.
“A good schnitzel tells a story of generations and culinary heritage.” – Traditional Austrian Chef
Pork chop cutlets have their own global story. Different cultures have made these cuts their own with special cooking methods:
American Southern cuisine features crispy breaded pork chop cutlets
Polish kotlet schabowy represents a beloved national dish
Japanese tonkatsu offers a distinctive deep-fried interpretation
Asian cuisines often incorporate complex marinades and spice blends
Exploring the cultural roots of pork schnitzel and pork chop cutlets shows how food connects us. It brings people together through shared cooking traditions and flavors.
Conclusion
Learning to cook pork cutlets opens up a world of flavors. You can make everything from classic pork schnitzel to bone-in pork chop cutlets. It’s all about mastering the right techniques and choosing the best cuts.
Pork chop cutlets are super versatile, with options like bone-in or boneless. Your cooking style can make a big difference. For example, a traditional schnitzel has crispy breading, while a grilled cutlet is golden and perfect.
Remember, cooking pork cutlets to 145°F is key for safety and flavor. They’re also packed with vitamins and minerals like Vitamin B6, B12, Iron, and Zinc. By trying different breading and cooking methods, you’ll find amazing flavors.
Getting good at cooking pork cutlets can lead to amazing meals. You’ll impress your family and friends with your skills. It’s a journey that lets your creativity shine.
FAQ
What is the main difference between pork schnitzel and pork chop cutlets?
Pork schnitzel is made from thin pork, breaded, and fried, from Austrian cuisine. Pork chop cutlets are thicker, with less breading and more meat flavor.
What cut of pork is best for making schnitzel?
The best cut for schnitzel is the pork loin. It’s lean, tender, and can be pounded thin. Choose a boneless loin for even thickness.
How do I prevent my pork cutlets from becoming dry?
To keep cutlets juicy, don’t overcook them. Use a meat thermometer to check for 145°F. Let them rest for 3-5 minutes after cooking. Brining or using a meat mallet helps too.
Can I bake pork cutlets instead of frying?
Yes, baking is a healthier option. Coat cutlets in breadcrumbs and bake at 425°F for 15-20 minutes. Spray with oil for crispiness.
What are the best side dishes for pork schnitzel?
Try potato salad, sauerkraut, and lemon wedges for a traditional taste. For something new, go for roasted veggies, cucumber salad, or tangy coleslaw. Choose sides that match the schnitzel’s crispy, savory taste.
How thick should pork cutlets be?
Schnitzel cutlets should be about 1/4 inch thick. Pork chop cutlets can be 1/2 to 3/4 inch thick. Even thickness ensures even cooking.
What is the traditional breading process for schnitzel?
The classic breading is flour, eggs, and breadcrumbs. This method gives a crispy, golden exterior that sticks well to the meat.
How can I tell when pork cutlets are fully cooked?
Check with a meat thermometer for 145°F. The meat should be white with no pink. Let it rest for 3-5 minutes to keep juices in.
Are there regional variations of schnitzel?
Yes, schnitzel has many variations. German, Czech, and Hungarian cuisines offer their own takes, using different meats and breading.
Can I prepare pork cutlets in advance?
You can prep cutlets ahead by breading and refrigerating them for up to 24 hours. Cook them just before serving for the best crispiness.
Looking for a tasty meal that’s easy to make and very satisfying? Baked pork cutlets are the perfect choice. They turn simple pork chop cutletsinto a dish that everyone will love.
Baked pork cutlets have a crispy outside and soft meat. This makes them great for those short on time but wanting a delicious meal. Baking is healthier than frying but still keeps the flavor and texture.
Your kitchen will fill with amazing smells as these cutlets bake. With simple ingredients and basic cooking skills, you’ll make a meal that impresses and warms the heart.
Key Takeaways
Baked pork cutlets are a healthier alternative to fried options
Minimal preparation time with maximum flavor impact
Perfect for weeknight dinners and family meals
A versatile dish that pairs well with multiple side dishes
Achieves crispy texture without excessive oil
Understanding Pork Cutlets: From History to Modern Kitchen
Pork cutlets have a long history in cooking, evolving from old ways to new ones. Knowing their past helps us enjoy this dish even more.
Different Types of Pork Cuts
Choosing the right cut is key for tasty pork schnitzel. Popular cuts include:
Loin chops: Lean and tender
Shoulder cuts: More affordable with rich flavor
Tenderloin: Extremely tender and low in fat
Evolution of Cooking Methods
Oldly, pork was mostly roasted or grilled. Baking is now favored for tender, juicy results. It lets you control the temperature and cook evenly.
“Cooking is an art, and pork cutlets are a delicious canvas of culinary creativity.” – Chef Mark Thompson
Cultural Significance in American Cuisine
Pork cutlets mean more than just food – they’re about comfort and tradition. With 85% of U.S. homes eating pork, they’re a big part of American cooking.
Pork Cut
Protein Content
Cooking Method
Loin Chops
26g per 100g
Baking
Shoulder Cuts
22g per 100g
Searing
Whether making a classic pork schnitzel or trying new recipes, knowing pork cutlets’ history and cooking methods will make you a better cook.
Essential Ingredients for Perfect Baked Pork Cutlets
Starting with the right ingredients is key to making delicious breaded pork cutlets. Your journey to a great meal begins with the essential parts that make it special.
To make perfect breaded pork cutlets, you need a few important ingredients:
1 pound pork tenderloin or boneless pork chops
1/2 cup panko breadcrumbs
1/4 cup grated Parmesan cheese
1 large egg white
Seasonings blend:
Seasoning
Amount
Garlic powder
1/2 teaspoon
Paprika
1/2 teaspoon
Salt
1/2 teaspoon
Black pepper
1/4 teaspoon
Pro tip: For the tenderest breaded pork cutlets, choose pork tenderloin. The quality of the meat greatly affects the dish’s texture and taste.
“The secret to amazing breaded pork cutlets lies in the quality of ingredients and careful preparation.” – Chef’s Wisdom
Panko breadcrumbs give your cutlets a crispy texture. Parmesan cheese adds a savory flavor that makes the dish stand out. Each ingredient is vital for a delicious meal that will wow your family and guests.
Remember, the art of cooking is about finding the right balance and adding your personal touch. Don’t be afraid to try different seasonings to make your breaded pork cutlets your own.
The Art of Breading: Creating the Perfect Crust
Learning to bread pork cutlets is key to making a tasty dish. The breading process is vital. It makes the outside crispy and locks in moisture, adding great texture.
Choosing the Right Breadcrumbs
Choosing the right breadcrumbs is crucial for cooking pork cutlets. Panko breadcrumbs are the best for a crispy coating. They are lighter and airier than regular breadcrumbs, making them crunchier.
Panko breadcrumbs: Ideal for maximum crispiness
Traditional breadcrumbs: Denser coating option
Seasoned breadcrumbs: Add extra flavor
Seasoning Secrets for Enhanced Flavor
To make your breaded pork cutlets better, add seasonings to your breadcrumbs. Mix salt, black pepper, garlic powder, and dried herbs. This will turn a simple cutlet into a dish fit for a restaurant.
Seasoning
Quantity (per 2 cups of breadcrumbs)
Salt
1 teaspoon
Black Pepper
1/2 teaspoon
Garlic Powder
1 teaspoon
Dried Herbs (Thyme/Parsley)
1 tablespoon
Proper Breading Technique
To get the perfect breading, follow a three-step process. Set up a breading station with flour, eggs, and breadcrumbs. Coat your pork cutlets carefully for an even, crispy outside.
Dredge the cutlet in flour
Dip in beaten eggs
Coat thoroughly with seasoned breadcrumbs
“The secret to perfect breaded pork cutlets is patience and a gentle touch during the breading process.”
Pro tip: Press the breadcrumbs gently onto the cutlet. This ensures a thick, even coating that will crisp up beautifully when baked or fried.
Step-by-Step Guide to Baked Pork Cutlets
Learning to cook pork cutlets needs focus and care. Baked pork cutlets can turn a simple dinner into a special meal your family will enjoy.
First, get your ingredients ready and set up your kitchen. Here’s a detailed guide to making perfect baked pork cutlets:
Prepare the Pork
Choose 1-inch thick pork cutlets
Pat the meat dry with paper towels
Let cutlets come to room temperature
Season the Meat
Mix spice blend:
1 tsp kosher salt
1 tsp onion powder
1 tsp garlic powder
3/4 tsp paprika
1/4 tsp black pepper
Evenly coat pork cutlets with spice mixture
Breading Process
Prepare three shallow dishes
First dish: flour
Second dish: beaten eggs
Third dish: breadcrumbs
Baking Instructions
Preheat oven to 400°F
Use a lightly oiled baking sheet
Bake for 20-23 minutes
Internal temperature should reach 145°F
“The secret to juicy baked pork cutlets is not overcooking and allowing them to rest after baking.” – Professional Chef
After baking, let the pork cutlets rest for 5 minutes before serving. This makes them tender and full of flavor.
Nutritional Information
Per Serving
Calories
372
Protein
36.4g
Total Fat
24.2g
Carbohydrates
2.7g
Pro tip: For extra crispiness in your baked pork cutlets, consider using panko breadcrumbs and a light spray of olive oil before baking.
Temperature and Timing: Keys to Juicy Results
Learning how to cook pork cutlets is all about temperature and timing. Get these right, and you’ll have a meal that wows everyone.
Optimal Oven Settings
The oven temperature is key when cooking pork cutlets. Set it to 400°F for the best results. This temperature gives a crispy outside and a juicy inside.
Preheat oven to 400°F
Use a baking sheet lined with parchment paper
Position rack in the middle of the oven
Internal Temperature Guidelines
When cooking pork, safety comes first. The ideal internal temperature is 145°F. Always use a meat thermometer to check if it’s done.
Thickness
Cooking Time
Internal Temperature
½ inch
7 minutes
145°F
1 inch
8-10 minutes
145°F
1½ inches
21 minutes
145°F
Resting Period Importance
After cooking, let your pork cutlets rest for 3-5 minutes. This crucial step allows juices to redistribute, making each bite juicy and flavorful.
“Patience is the secret ingredient to perfectly cooked pork cutlets.” – Professional Chef
By sticking to these temperature and timing tips, you’ll make delicious pork cutlets that are always juicy and full of flavor.
Complementary Sauces and Side Dishes
Make your pork schnitzel meal special with the right side dishes and sauces. These can turn simple baked pork cutlets into a memorable feast. The perfect pairings will delight your taste buds.
Creamy mashed potatoes with a buttery texture
Roasted Brussels sprouts with maple-bacon glaze
Honey-glazed carrots and parsnips
Garlic-parmesan roasted green beans
Southern-style collard greens
Adding the right sauce can really boost your pork schnitzel’s flavor. Here are some tasty options:
Alabama White Sauce – A tangy, creamy condiment
Mustard BBQ sauce with brown sugar and honey
Homemade applesauce with a hint of cinnamon
Cranberry sauce with ginger for a spicy twist
“The perfect side dish can transform a good meal into an extraordinary culinary experience.”
For your baked pork cutlets, mix textures and flavors on your plate. A crisp veggie side with a creamy sauce is a winning combo. It will surely impress your guests.
Troubleshooting Common Issues with Baked Pork Cutlets
Cooking breaded pork cutlets can be tricky. But with the right techniques, you can avoid common pitfalls. Knowing how to troubleshoot potential problems is key to cooking them perfectly.
Preventing Dry Cutlets
Dry pork cutlets can ruin your meal. To keep your breaded pork cutlets moist:
Brine the meat for 30 minutes before cooking
Use an instant-read thermometer to check internal temperature
Remove cutlets from oven when they reach 140°F
Let meat rest for 5 minutes after cooking
Fixing Breading Problems
Ensure your breading sticks perfectly with these pro tips:
Pat meat dry before breading
Create a three-step coating process:
Flour
Egg wash
Breadcrumb mixture
Press breadcrumbs firmly onto the meat
Use Panko breadcrumbs for extra crispiness
Storage Solutions
Storage Method
Duration
Recommended Technique
Refrigerator Storage
Up to 4 days
Use airtight container
Freezer Storage
Up to 3 months
Wrap individually in plastic wrap
Reheating
10-15 minutes
Oven at 350°F on wire rack
Pro tip: When reheating, use a wire rack over a baking sheet. This helps keep the breading crispy and prevents it from getting soggy.
“Perfecting pork cutlets is an art that requires practice and patience.” – Culinary Expert
Variations and Creative Twists
Make your pork chop cutlets stand out with new flavors and cooking methods. Turning basic baked pork schnitzel into a fancy dish is simple.
Try different breading options to take your pork cutlets to the next level. Here are some tasty choices:
Nutty Crust: Use crushed almonds or pecans instead of breadcrumbs for extra crunch
Herb-Infused Coating: Add dried herbs like thyme, rosemary, and oregano to your breadcrumb mix
Spicy Kick: Add cayenne pepper or smoked paprika for a zesty taste
Gluten-Free Option: Use crushed gluten-free crackers or cornflake crumbs
Your pork chop cutlets are a blank canvas for creativity. Try international flavors with these ideas:
Mediterranean Style: Top with crumbled feta and sun-dried tomatoes
Asian-Inspired: Use panko breading with sesame seeds and green onions
Southwestern Twist: Add a chipotle and lime seasoning blend
The secret to perfect pork schnitzel is finding the right balance of flavors. With these creative ideas, you’ll make a simple meal unforgettable.
Conclusion
Baked pork cutlets are a fun culinary journey. They turn simple ingredients into a meal fit for a restaurant. By learning how to cook them well, you can improve your cooking at home. This makes your meals both healthy and tasty.
The secret is in controlling the temperature, choosing good cuts, and seasoning right. Your journey with baked pork cutlets is ongoing. Each time you cook, you get better and try new flavors.
Make sure to cook them to 145°F for safety and flavor. A good kitchen thermometer, costing $20 to $25, helps you cook them perfectly. This ensures your pork cutlets are always tender and juicy.
Baked pork cutlets are great for any meal, whether it’s a quick dinner or a big event. Try different breading and seasonings. Make the recipe your own. With practice, you’ll impress everyone with your cooking.
As you keep exploring baked pork cutlets, your cooking skills will grow. Enjoy the learning and the tasty dishes you make. Keep being curious and have fun with your cooking adventures.
FAQ
What are the best cuts of pork for making cutlets?
Boneless loin pork chops or pork tenderloin are great for cutlets. They are lean and tender, perfect for breading and baking. Choose cuts that are 1/2 to 3/4 inch thick for even cooking and a crispy outside.
How do I prevent my pork cutlets from becoming dry?
To keep cutlets juicy, don’t overcook them. Use a meat thermometer to check the temperature. Aim for 145°F and let the meat rest for 3-5 minutes after cooking. Brining the pork before cooking also helps keep it moist and flavorful.
Can I make pork cutlets gluten-free?
Yes, you can! Use gluten-free breadcrumbs or alternatives like crushed gluten-free crackers, almond flour, or crushed nuts. Gluten-free panko-style breadcrumbs also work well for a crispy coating.
What’s the difference between frying and baking pork cutlets?
Baking is healthier than frying because it uses less oil. Baked cutlets can still get crispy with the right breading and cooking temperature (around 425°F). Baking is also cleaner and easier to do.
How long should I bake pork cutlets?
Pork cutlets usually bake for 15-20 minutes at 425°F. The exact time depends on the cutlet’s thickness. Always check with a meat thermometer to ensure the meat reaches 145°F for safety and juiciness.
Can I prepare pork cutlets ahead of time?
Yes, you can prepare breaded pork cutlets in advance. Bread the cutlets and refrigerate them on a baking sheet for up to 24 hours before baking. You can also freeze them for up to a month. Just add a few extra minutes to the cooking time when baking from frozen.
What are some good sauce options for pork cutlets?
Try lemon wedges, lingonberry sauce, mushroom gravy, or a parmesan-herb sauce. Mustard-based sauces, ranch dressing, or a light cream sauce also complement crispy cutlets well.
How do I store leftover pork cutlets?
Store leftover cutlets in an airtight container in the fridge for 3-4 days. Reheat in an oven or air fryer to keep them crispy. Avoid microwaving to prevent soggy breading. Reheat at 350°F for about 10 minutes until hot through.